Hypercam Assembly Guide
Hardware Required
- 2 x Torx buttonhead M3 x 20 screws to mount to frame
- 2 x Torx countersunk M3 x 14 screws (for mounts)
- 2 × brass heat-set inserts
- 4 x 2mm self-tapping screws (for back plate)
- Hypercam USB camera module
Hypercam Assembly Step One
Install Brass Heat-Set Inserts
- Locate the heat-set insert holes on each end of the camera housing
- Heat your soldering iron to the proper temperature for brass inserts
- Press one brass heat-set insert into each side of the housing
- Ensure inserts are seated flush and square
- Allow the plastic to cool completely before continuing
Hypercam Assembly Step Two
Attach Left and Right Mounts
- Align the left mount with the housing
- Insert a Torx countersunk screw through the mount and into the heat-set insert
- Repeat for the process for the right mount
- Tighten screws until snug
- Do not overtighten
Hypercam Assembly Step Three
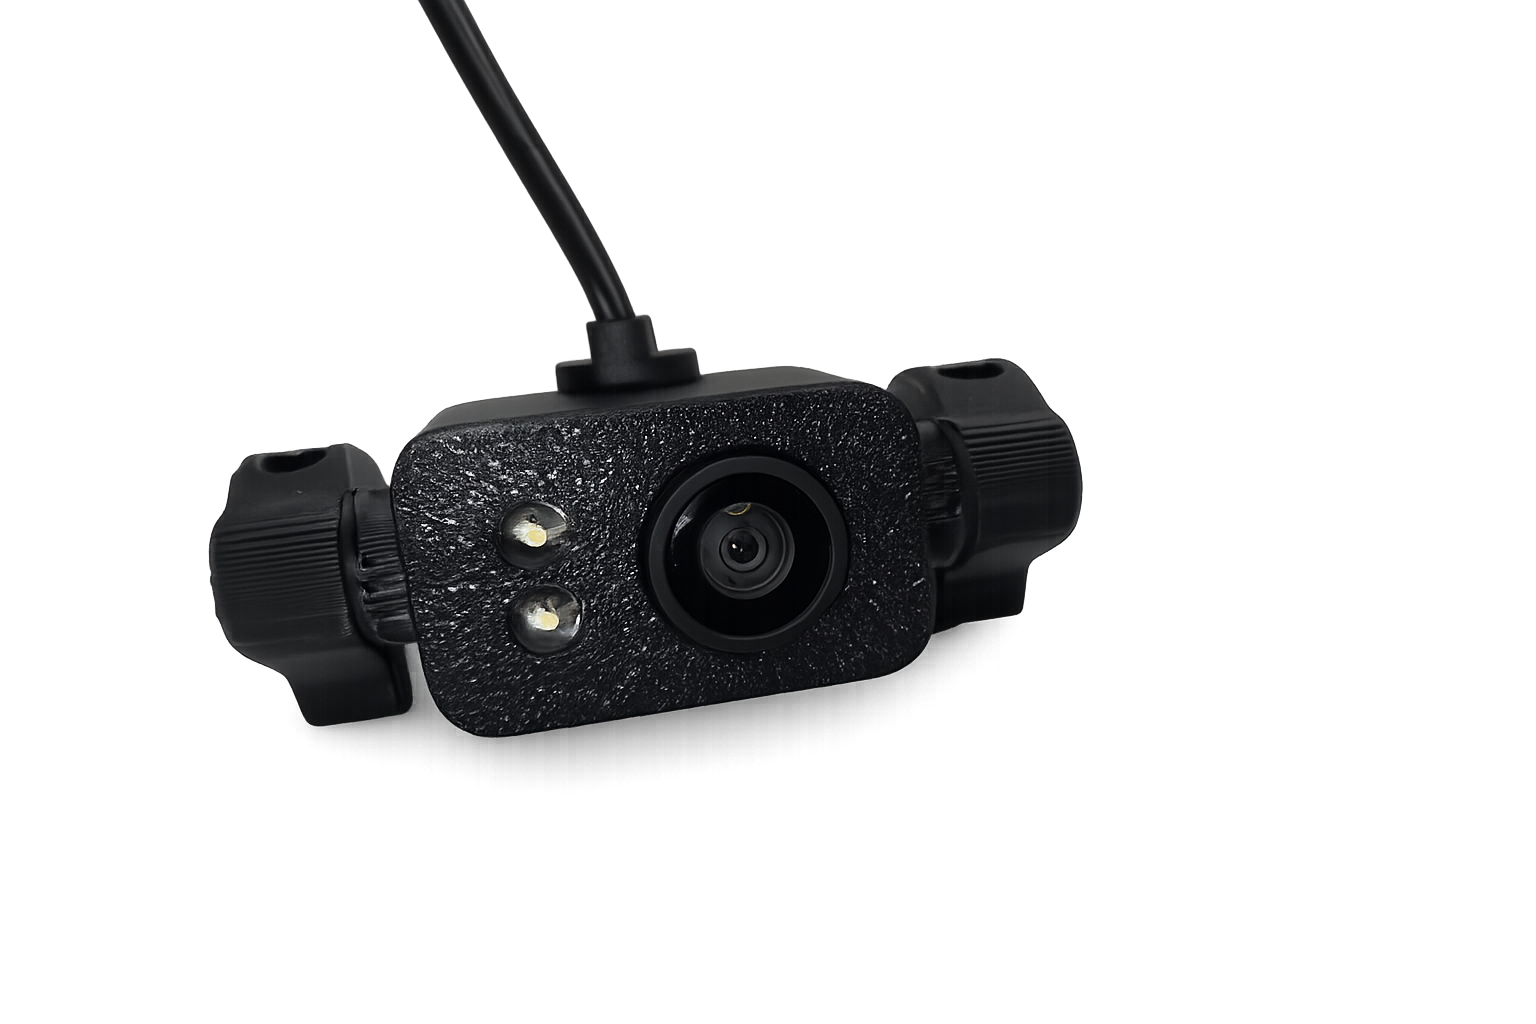
Identify Camera Orientation
- Locate the camera lens on the front of the module
- Identify the two LED lights next to the lens
- Confirm the USB cable exits from the rear of the camera
The lens and LEDs must face forward during installation.
Hypercam Assembly Step Four
Route USB Cable
- Feed the USB cable through the rear slot in the camera housing
- Ensure the cable is not twisted or pinched
- Leave enough slack for the camera to fully seat inside the housing
Hypercam Assembly Step Five
Insert Camera Module
- Insert the camera module into the housing from the rear
- Guide the USB cable through the slot as the camera slides forward
- Seat the camera fully inside the housing
Confirm the following:
- The lens is centered in the front opening
- Both LEDs align with the front LED holes
Hypercam Assembly Step Six
Install Rear Back Plate
- Place the back plate onto the rear of the housing
- Align all mounting holes
- Install the 2 mm self-tapping screws
- Tighten evenly until the back plate sits flush
Hypercam Assembly Step Seven
Final Inspection
- Lens is unobstructed and centered
- LEDs are visible and aligned
- USB cable exits cleanly from the rear slot
- Back plate is secure
- Mounts are tight and square
Hypercam Assembly Complete
The Hypercam is now fully assembled and ready for mounting and configuration.
Available Downloads
Hypercam downloads
| Version | File | Type | Notes |
|---|---|---|---|
| v1.0.0 | Hypercam STL Files | STL (ZIP) | Printable parts pack |